Articles > How to Optimize Your Webcam Stream
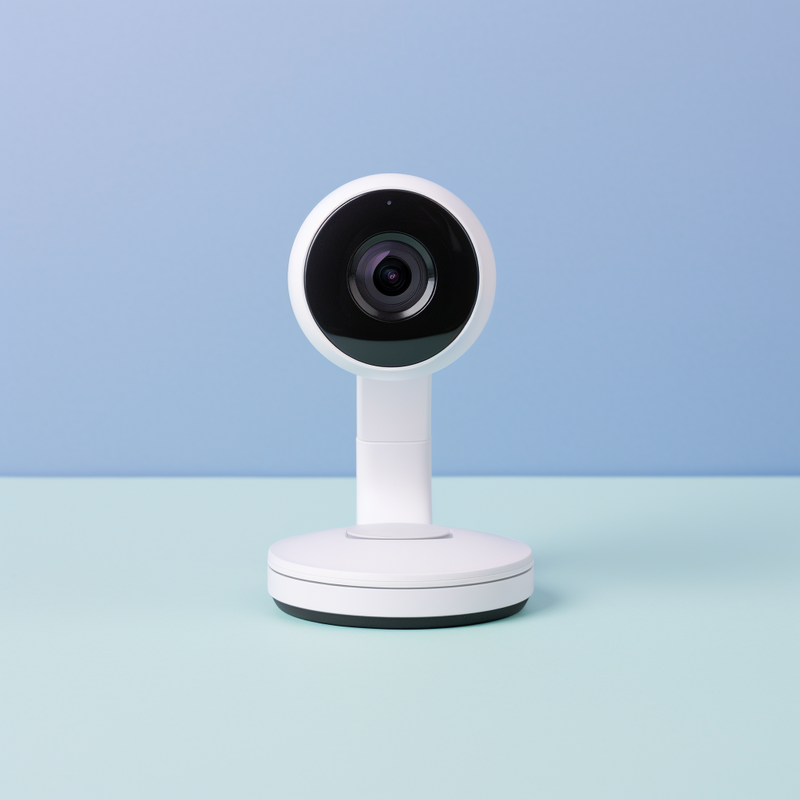
USB webcams provide several benefits, including easy connectivity, high-quality video and audio, and flexibility for use with different devices. Setting up a VDO360 webcam is simple:
1. Connect the USB webcam to your computer using the provided cable.
2. Wait for the computer to recognize the new hardware and install any necessary drivers.
3. Once the webcam is recognized, open your preferred video conferencing software or camera app.
4. Select the VDO360 webcam as your video input device, and adjust the settings as needed.
To optimize performance, ensure that the webcam is placed in a well-lit area with minimal background noise. Position the webcam at eye level for the best angle. Additionally, using software tools such as OBS Studio or ManyCam can enhance your webcam experience by adding features like filters, effects, and virtual backgrounds.
In conclusion, USB webcams like the VDO360 offer convenience, high-quality video, and versatility. Setting up the webcam is straightforward, and optimizing its performance can be achieved with proper lighting and positioning. Utilizing software tools can further enhance your webcam experience for a professional and engaging video conferencing or streaming.
Webcam resolution plays a crucial role in determining the overall video quality for live streaming, video calls, and content production. The resolution refers to the number of pixels that make up the image, with higher resolutions resulting in clearer and sharper images. This directly impacts the viewing experience, allowing for better visual clarity and an overall improved video quality.
For live streaming, higher webcam resolutions provide a more professional and polished appearance, capturing details with precision and offering a more engaging experience for viewers. In video calls, a higher resolution ensures that the image is sharp and clear, allowing for better communication and connection. In content production, a higher resolution enables creators to capture finer details and produce high-quality videos that stand out.
Moreover, webcam resolution also affects the ability to add filters, effects, and backgrounds using tools like FineCam. Higher resolutions provide better clarity and detail, allowing for more accurate and realistic application of these features, enhancing the overall visual appeal of the content.
In conclusion, webcam resolution is vital for achieving clear, high-quality images, ultimately enhancing the overall video experience for both creators and viewers.
In today's increasingly connected world, the use of webcams has become more prevalent than ever. The benefits of higher resolution webcams are numerous and wide-ranging, making them a valuable tool for a variety of users. Whether for professional video conferences, virtual meetings, online interviews, or personal video calls, higher resolution webcams offer improved clarity, sharpness, and overall image quality. These webcams provide a more immersive and detailed viewing experience, allowing for better communication and interaction with others. Additionally, higher resolution webcams are ideal for content creators and streamers who require crystal-clear visuals for their online content. The enhanced image quality can help to create a more professional and engaging presentation. Moreover, higher resolution webcams are also beneficial for security and surveillance purposes, offering clearer and more detailed monitoring capabilities. Overall, the benefits of higher resolution webcams make them a valuable tool for both personal and professional use in today's digital age.
Currently, the quality of my webcam is fairly good. The lighting in the room is well-balanced, providing clear visibility without any harsh shadows. In OBS settings, I have adjusted the video bitrate and resolution to ensure smooth streaming and recording. Audio filters are also in place to reduce background noise and improve the overall sound quality.
To further assess the webcam resolution and clarity, I checked the Windows 11 camera settings. I made adjustments to the brightness, contrast, and video HDR features to enhance the overall image quality. The webcam resolution is set to its highest possible setting, providing sharp and detailed visuals.
In conclusion, the current quality of my webcam is satisfactory, thanks to the well-managed lighting, OBS settings, and audio filters. By utilizing the Windows 11 camera settings, I was able to further improve the resolution and clarity of the webcam feed, resulting in a more professional and polished appearance for virtual meetings, streaming, and recording.
When evaluating webcam quality based on image sharpness and clarity, it is important to check for pixelation, blurriness, and overall image detail. Look for any distorted or blocky areas in the image, as this indicates pixelation. Assess the sharpness of the image by examining the fine details and edges to ensure they are clear and well-defined.
Pay attention to the resolution and color accuracy of the webcam. The video should be crisp and true to life, with accurate color representation. Consider factors such as lighting, background, and positioning that can impact the sharpness and clarity of the image. Good lighting and a clutter-free background can enhance image quality, while proper positioning can ensure a clear and focused image.
In summary, when evaluating webcam quality, consider image sharpness, clarity, pixelation, resolution, color accuracy, and environmental factors. By paying attention to these factors, you can ensure that your webcam provides high-quality, clear, and sharp images.
Introduction: The use of webcams has become an integral part of our daily lives, whether it be for virtual meetings, online classes, or live streaming. However, the resolution of current webcams may pose limitations in capturing high-quality images and videos, which can impact the overall user experience. In this article, we will explore the various limitations in current webcam resolution and discuss potential solutions to address these challenges.
1. Factors affecting webcam resolution:
The resolution of a webcam is influenced by various factors such as the sensor quality, lens type, and image processing capabilities. Understanding these factors is essential in identifying the limitations in current webcam resolution.
2. Impact on image and video quality:
Low resolution in webcams can result in grainy, pixelated, and distorted images and videos. This limitation can hinder the overall user experience, especially in scenarios where high-quality visuals are crucial, such as video conferencing and content creation.
3. Potential solutions:
Advancements in technology and the development of high-resolution sensors and lenses can help address the limitations in current webcam resolution. Additionally, optimizing image processing algorithms and enhancing connectivity bandwidth can also contribute to improving webcam resolution.
To enhance webcam image quality, it is essential to utilize proper lighting techniques. Position yourself in front of a well-lit area to avoid any shadows or dimly lit spots on your face. Adjust the intensity and angle of your light source to achieve a flattering and evenly lit appearance for your video meetings. Avoid backlighting, as it can create an unflattering silhouette effect.
Utilizing ring lights, softbox lights, or natural window light can greatly improve the quality of your webcam image. Ring lights provide a direct and even source of light, softbox lights create a soft and diffused light, and natural window light can offer a flattering and warm glow. Experiment with different lighting options to find the best one for your setup.
By following these lighting techniques and positioning yourself correctly, you can significantly enhance the image quality of your webcam. Take the time to adjust the lighting intensity and angle to achieve the most flattering look for your video meetings. With the right lighting, your webcam image will appear clear, well-lit, and professional, leading to a more engaging and visually appealing video presence.
The impact of lighting on webcam image quality cannot be overstated. Poor lighting can result in grainy, shadowy, or washed-out images, while proper lighting can drastically improve the overall appearance.
To avoid backlighting, it's best to position the light source in front of you, rather than behind. This will help to evenly light your face and prevent harsh shadows. Achieving even lighting is also important for a flattering appearance on camera. This can be accomplished by using multiple light sources or diffusing the light with a softbox to minimize harsh shadows and create a more natural look.
Proper lighting is essential for creating a professional and engaging presence on camera. It can help to convey a sense of confidence and competence, as well as ensure that your facial expressions are clearly visible.
Recommended lighting setups to enhance webcam quality include ring lights, which provide even and flattering illumination, and softbox lights, which can help to create a more natural and diffused light. These lighting setups are widely available and can greatly improve the overall appearance of your webcam image.
In conclusion, understanding the impact of lighting on webcam image quality is crucial for creating a professional and engaging presence on camera. By avoiding backlighting, achieving even lighting, and utilizing recommended lighting setups, you can significantly enhance your webcam image quality.
Achieving adequate lighting conditions is crucial for ensuring optimal video resolution. Without the proper lighting, video quality can suffer, leading to grainy or pixelated images. Whether you're recording a video for personal use, vlogging, or conducting a professional video conference, these tips can help you improve your lighting setup to achieve the best possible results.
1. Open your webcam settings by accessing the settings or options within the software or application you are using to access the webcam.
2. Look for the resolution or video quality settings. Increase the resolution to the highest possible setting for better image quality.
3. Adjust the frame rate if necessary. A higher frame rate can improve video smoothness but also increase CPU power and bandwidth usage.
4. Consider using hardware acceleration if available, as it can offload some processing from the CPU and help improve resolution without overburdening the system.
5. Keep an eye on CPU power and bandwidth usage while making these adjustments. High resolution and frame rates can increase the demand on the CPU and consume more bandwidth, so find a balance between image quality and system resources.
6. Test the webcam with the new settings to ensure it is functioning as desired without overloading the system.
By optimizing these settings, you can achieve a higher resolution without sacrificing too much CPU power or bandwidth usage, thus improving the overall quality of your webcam experience.
To start maximizing the video quality of your webcam, open your chosen webcam program and navigate to the settings screen. Once there, begin by adjusting the lighting settings to ensure that you are well-lit and avoid any harsh shadows. Fine-tune the exposure settings to avoid overexposure or underexposure, resulting in a balanced and clear image. Next, adjust the contrast settings to ensure that the colors in the video are vibrant and rich, enhancing the overall quality of the image. Finally, adjust the sharpness settings to ensure that the video is crisp and clear.
Make small, incremental adjustments to each of these settings and regularly check the changes have had a positive impact on the video quality. Keep in mind that the optimal webcam settings can vary depending on the lighting conditions and your surroundings, so be sure to make adjustments as necessary. By making these fine adjustments to your webcam settings, you can significantly improve the overall video quality, resulting in a clearer and more professional appearance for your video calls and recordings.
To adjust the brightness, contrast, saturation, and sharpness on your webcam using FineCam, first, open the FineCam application and access the settings menu. Look for the options specifically designated for adjusting these parameters.
To adjust the brightness, increase or decrease the slider until the desired level of brightness is achieved. For contrast, similarly adjust the slider to decrease or increase the contrast level. Saturation can be adjusted by finding the saturation option and increasing or decreasing the slider to enhance or reduce the color intensity. Finally, to adjust sharpness, locate the sharpness option and fine-tune the slider to sharpen or soften the video quality.
It is important to continuously monitor the video feed from your webcam while making these adjustments to ensure the desired video quality is achieved. Experiment with different combinations of brightness, contrast, saturation, and sharpness settings to find the perfect balance for your webcam.
By following these steps, you can easily adjust the brightness, contrast, saturation, and sharpness of your webcam using FineCam to achieve the best video quality for your needs.
When using a built-in camera on a smartphone or digital device, it's important to understand the various options and controls available. By exploring these features, users can unlock the full potential of their camera and take high-quality photos and videos. Understanding the different settings and how to manipulate them can help users capture the perfect shot in any situation. Whether it's adjusting exposure, utilizing different shooting modes, or experimenting with filters and effects, the built-in camera offers a wealth of options to enhance and customize every image. Whether you're a photography enthusiast or simply looking to improve your social media game, taking the time to explore and master the built-in camera options and controls can greatly improve your overall photography experience.
When selecting a webcam with higher resolution, there are several key factors to consider. First and foremost, prioritize resolution and frame rate for high-quality video streaming and recording. Look for a webcam with a higher megapixel count as this will ensure sharper and more detailed images. A higher frame rate, preferably 60 frames per second, will also result in smoother and more fluid video recordings.
Additionally, consider the quality of the lens in the webcam. A high-quality lens will contribute to better image sharpness and color accuracy. Compatibility with your computer is crucial, so make sure the webcam is compatible with your operating system and has the necessary ports for connectivity.
Finally, consider your budget. High-resolution webcams with superior features can be more expensive, so it's important to find a balance between your desired specifications and your budget. Research different brands and models to find the best webcam that meets your resolution and frame rate requirements while also staying within your budget. By considering these key factors, you can select a webcam with higher resolution that will provide a superior video streaming and recording experience.
When researching available webcams with improved resolution capabilities, consider the Logitech Brio Ultra HD Webcam. This webcam supports 4K resolution, allowing for crystal-clear video quality. It also features advanced color adjustment and brightness settings, giving users full control over their video output. Additionally, the Logitech Brio is compatible with both Windows and Mac platforms, making it versatile for various users.
Another option to explore is the Razer Kiyo Pro. This webcam boasts a high-resolution capability and offers advanced settings for adjusting colors and brightness. It also includes a built-in adjustable light for optimal video quality in any lighting condition. The Razer Kiyo Pro is also compatible with both Windows and Mac platforms, making it a versatile choice for users who switch between different operating systems.
Lastly, the Elgato Facecam is worth considering. This webcam supports 1080p resolution and offers advanced controls for color, brightness, and filters. It is designed for professional content creators and is compatible with both Windows and Mac platforms, ensuring flexibility in use.
These webcams offer improved resolution capabilities, advanced color and brightness adjustment features, and compatibility with both Windows and Mac platforms, providing users with high-quality video output and versatility in use.
 Author: Dave Smiley