Articles > How to Optimize Your Webcam Stream
When preparing for a video meeting, it is crucial to present yourself professionally to convey competence and respect for the meeting. Start by dressing in appropriate attire, such as business casual or formal attire, to show that you take the meeting seriously. Avoid loud patterns or bright colors that can be distracting on camera. Additionally, ensure that your background is tidy and plain, with minimal clutter or distractions. A neutral or professional background, such as a plain wall or a bookshelf, can help convey a sense of professionalism.
The way you present yourself in a video meeting is just as important as an in-person meeting, so it is important to pay attention to your attire and background choices. By dressing appropriately and choosing a plain, tidy background, you can effectively convey professionalism and make a positive impression on your colleagues or clients. Remember, the way you present yourself in a video meeting can greatly impact the way you are perceived, so take the time to prepare and present yourself professionally.
Good webcam lighting is essential for streamers and professionals as it significantly enhances viewer experience, maintains brand identity, and reduces eye strain. Adequate lighting can make a significant difference in the quality of the video and can capture the attention of the viewers. It helps in creating a professional and polished look, which is essential for maintaining brand identity. Furthermore, good lighting reduces eye strain for both the streamer/professional and the viewers, thus promoting a more comfortable viewing experience.
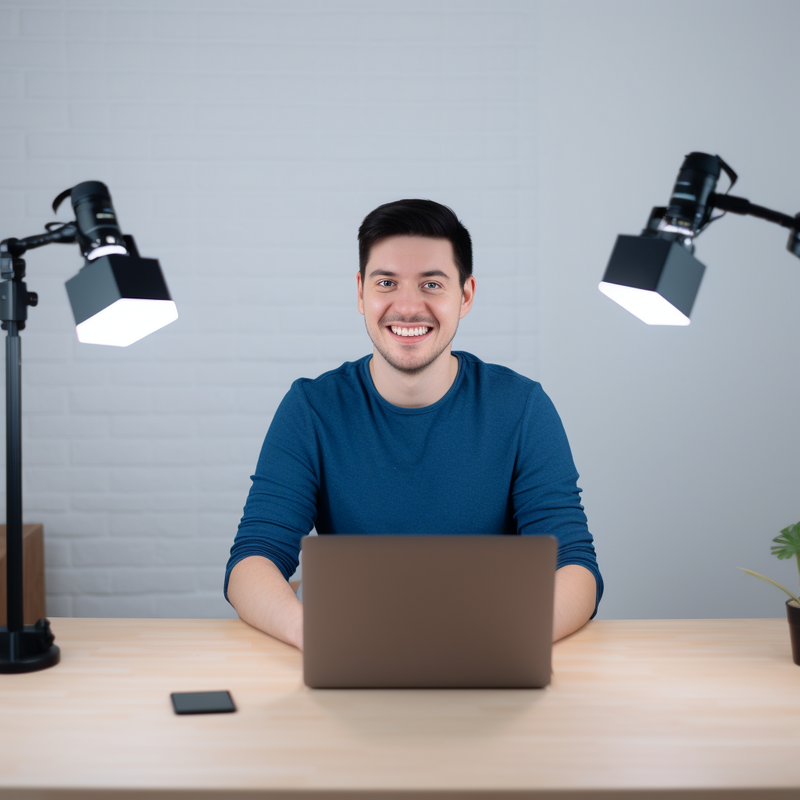
To achieve good webcam lighting, it is essential to utilize white or light-colored walls and tables to reflect the light effectively. This helps in creating a bright and evenly lit space, which can enhance the overall appearance. Additionally, investing in professional lighting equipment can also greatly improve the quality of the video and provide consistent and flattering lighting for video conferencing.
In conclusion, good webcam lighting is crucial for streamers and professionals as it not only enhances the viewer experience and maintains brand identity but also reduces eye strain for all parties involved. By implementing these tips, streamers and professionals can ensure that their video content is of the highest quality.
Video conferencing has become an essential part of our daily lives, whether for work, school, or personal connections. However, the quality of our video calls can be greatly improved with proper lighting. Whether you are using natural light or investing in professional lighting equipment, enhancing your video conference experience with the right lighting can make a significant difference in how you are perceived and how clearly you are seen. In this section, we will discuss the importance of good lighting for video calls and provide tips on how to achieve the best lighting setup for your own video conferencing needs.
There are three main types of lighting used in video production: key light, fill light, and backlight. The key light is the primary source of light and is used to illuminate the subject, providing the main focus of the scene. The fill light is used to soften the shadows created by the key light, providing more balanced lighting. The backlight is used to separate the subject from the background, creating depth and dimension.
On the other hand, ring lights, LED panels, and light bars are commonly used for video conference lighting. Ring lights are circular and provide even, diffused light, making them great for eliminating harsh shadows and producing a flattering, soft glow. LED panels are versatile and offer adjustable brightness and color temperature, allowing for customizable and natural-looking lighting. Light bars are slim, lightweight, and portable, making them ideal for illuminating the face evenly during video conferences.
Understanding the different types of lighting and their characteristics is essential for achieving the best video lighting for various purposes, whether it's for professional video production or enhancing video conference lighting quality.
When it comes to video conferencing, there are several lighting sources that can be used to ensure a clear and well-lit setup. Natural light is a popular choice as it provides a soft and even illumination, but it can also cause glare and shadows if not properly managed. To optimize natural light for video conferencing, position your camera facing the window to avoid harsh shadows and use sheer curtains to diffuse the light.
Overhead lights are another option for video conferencing, but they can create unflattering shadows and harsh glares. To mitigate this, consider using a softbox or diffuser to soften the light and minimize glare. Desk lamps can provide focused and adjustable lighting, but they may produce a warm or cool color temperature that can affect the appearance of your skin tone. Using a desk lamp with a daylight-balanced bulb can help create a more natural and flattering lighting for your video conference.
Each lighting source has its own benefits and drawbacks, but with the right adjustments, they can all contribute to a well-lit video conferencing setup. Paying attention to factors such as glare, shadows, and color temperature can ultimately help you achieve a clear and professional-looking video conference.
When it comes to lighting, there are various sources to consider, each with their own set of advantages and disadvantages. Understanding the pros and cons of each type of lighting source can help you make an informed decision when it comes to illuminating your space.
Incandescent Lighting:
Pros: Incandescent bulbs are relatively inexpensive to purchase and produce a warm, inviting light that is flattering to skin tones.
Cons: They have a short lifespan and are not energy-efficient, resulting in higher electricity bills.
Fluorescent Lighting:
Pros: Fluorescent bulbs are more energy-efficient than incandescent bulbs and have a longer lifespan. They also produce a brighter light, making them ideal for work spaces.
Cons: Some people may find the light from fluorescent bulbs to be harsh and unflattering. They also contain mercury, which can be harmful if the bulb breaks.
LED Lighting:
Pros: LED bulbs are the most energy-efficient option, using up to 80% less energy than incandescent bulbs. They also have an incredibly long lifespan and come in a range of color temperatures.
Cons: LED bulbs can be initially more expensive to purchase than other types of bulbs, and some people may find the light to be too bright or harsh.
Natural light can greatly enhance the quality of video calls and streaming by providing a more flattering and natural-looking appearance. It also helps to create a warm and inviting atmosphere, making the content more engaging for viewers. To make the most of natural light, positioning oneself facing a window or source of sunlight can provide a soft and flattering illumination. It's important to avoid harsh direct sunlight, which can cause overexposure and harsh shadows.
In different settings, optimizing natural lighting can be achieved by using sheer curtains, blinds, or other means to control the intensity and direction of the sunlight. Diffusing and softening the light with sheer fabric or white curtains can help to create a more even and gentle illumination, while reflecting the sunlight with white foam boards or reflectors can fill in shadows and brighten the overall look.
Overall, the benefits of natural light for video calls and streaming are undeniable, and by utilizing these simple tips, one can greatly improve the quality and appearance of their video content.
To harness the benefits of natural light for webcam streaming, position yourself near a window to capture the best natural light for a more flattering appearance. Face the window directly to avoid glare, and adjust the blinds or curtains if the light is too bright. Experiment with different lighting setups to find the most flattering and well-lit option. By utilizing natural light, you can achieve a more flattering and professional appearance during webcam streaming. It's important to find the right balance of natural light to avoid overexposure or harsh shadows. By positioning yourself near a window and facing it directly, you can take advantage of the soft, diffuse light that will enhance your appearance on camera. Experimenting with different setups will allow you to find the best angle and positioning to maximize the benefits of natural light for webcam streaming. By following these tips, you can ensure that you look your best and present a professional image during your webcam streaming sessions.
When it comes to getting the best lighting for tasks such as reading, studying, or working on a project, positioning yourself near a window or open area is key. Natural light not only provides a bright and clear illumination, but it also helps reduce eye strain and provides a more comfortable and inviting ambiance. Whether you're writing, doing homework, or just need a well-lit space for any activity, choosing the right spot by a window can make a significant difference in your productivity and overall well-being.
In video conferencing, the key light is your best friend when it comes to creating a professional and flattering appearance. This primary light source plays a crucial role in illuminating the subject and balancing out any unflattering shadows. It helps to ensure that you are well-lit and that your facial features are highlighted, making you look more presentable and engaging to your audience.
To achieve optimal results, position the key light in front of you and slightly off to the side, either at eye level or slightly higher. This will help to create a soft, even illumination that minimizes harsh shadows and provides a more flattering look. There are several key light options available, such as ring lights, clip-on lights, and desk lamps. Ring lights are popular for their even and balanced lighting, while clip-on lights and desk lamps offer versatility and ease of use.
Overall, the key light is essential for enhancing your appearance during video conferencing, making sure that you look professional and well-lit to your audience. With the right positioning and choice of key light, you can ensure that you make a great impression during your virtual meetings and presentations.
Key light is a crucial element in improving webcam appearance as it serves as the main source of light that illuminates the subject. This essential lighting technique helps to reduce harsh shadows and provides a more flattering look on camera. By positioning the key light properly, it can help to minimize the appearance of blemishes and create more balanced facial features.
The role of the key light in webcam appearance is to ensure that the subject is well-lit and clearly visible on screen. Without adequate key lighting, the webcam image can appear dull, unflattering, and lackluster. Proper key lighting is important for creating a professional and polished look, whether for virtual meetings, video calls, or live streaming.
In conclusion, key light plays a crucial role in improving webcam appearance by serving as the primary source of light to illuminate the subject, reduce shadows, and create a more flattering and balanced look on camera. Therefore, it is essential to understand the importance of key lighting for achieving a more visually appealing and professional webcam presence.
When setting up key light for a photography or video shoot, it is essential to consider the recommended positioning and angle to achieve the best results. The key light serves as the primary source of illumination, and its positioning and angle can greatly impact the overall appearance of the subject. By following the recommended guidelines, you can ensure that the key light effectively illuminates the subject and creates the desired look for your project. Whether you are aiming for a dramatic or natural lighting effect, understanding the optimal positioning and angle for the key light setup is crucial for achieving professional and visually appealing results.
The three-point lighting setup is a standard technique used in photography, cinematography, and video production to create a balanced and professional look. It consists of three primary lights: the key light, fill light, and backlight.
The key light is the primary source of illumination and is positioned in front of the subject. It provides the main light and sets the overall mood and tone of the scene. The fill light is placed behind the key light and serves to fill in the shadows created by the key light, reducing the harshness of the shadows and creating a more balanced look. The backlight, placed behind the subject, adds depth and separation, creating a 3D effect and preventing the subject from blending into the background.
Each light contributes to the overall professional look of the setup by providing balanced illumination, reducing shadows, and adding depth and dimension to the subject. When used effectively, the three-point lighting setup can greatly enhance the visual appeal of the subject and create a polished and professional look.
In conclusion, the three-point lighting setup, with its key light, fill light, and backlight, is essential for achieving a professional and visually appealing look in photography, cinematography, and video production.
Three-point lighting is a standard method used in video lighting to create a balanced and professional look. This setup consists of three key components: the key light, fill light, and backlight. The key light is the main and brightest source of light, placed at a 45-degree angle to the subject. It provides the primary illumination and sets the overall mood of the scene. The fill light is positioned on the opposite side of the key light and is used to soften the shadows created by the key light. The backlight, placed behind the subject, adds depth and separation from the background by highlighting the edges of the subject.
The pros of using three-point lighting include creating a visually appealing and well-balanced look, enhancing the visual depth and dimension of the subject, and the ability to control the intensity and direction of the light. However, the setup can be time-consuming to adjust and may require additional equipment.
Anyone creating video content, such as filmmakers, YouTubers, or photographers, would benefit from using three-point lighting to achieve professional and polished results.
To achieve balanced illumination, it is essential to properly position and use the key, fill, and backlight in the setup. Begin by placing the key light in front of the subject, ensuring it is the brightest source of light. This light source should be positioned at an angle to create pleasing and natural-looking shadows. Next, position the fill light behind the key light, providing softer illumination to fill in any shadows created by the key light. The fill light should not be as bright as the key light but should still provide enough light to balance the overall illumination. Lastly, place the backlight behind the subject to separate them from the background. The backlight should create a subtle rim of light around the subject, enhancing their outline and adding depth to the image. By carefully positioning the key, fill, and backlight in this way, you can achieve balanced illumination that effectively highlights the subject while minimizing unwanted shadows and creating separation from the background.
 Author: Decentralized User