Articles > 5 Creative Ways to Use a Webcam
The use of technology has revolutionized online tutoring and learning, providing new opportunities to engage with students and deliver effective education. One popular platform for synchronous online class sessions is Zoom, which offers a range of tools to facilitate interactive learning experiences.
To utilize Zoom for online tutoring, teachers can create virtual classrooms where they can conduct live video sessions, share screens, and use interactive whiteboards to explain concepts. Additionally, breakout rooms can be used for small group discussions and activities.
Various devices can be used to access Zoom, including laptops, desktops, tablets, smartphones, and desk phones. This wide compatibility allows both tutors and students to join sessions from wherever they are, enabling flexible and convenient learning opportunities.
By leveraging technology, online tutoring can be made more interactive, personalized, and engaging, ultimately improving the learning experience for students. With the right tools and strategies, educators can take advantage of synchronous online sessions to provide valuable instruction and support to their students.
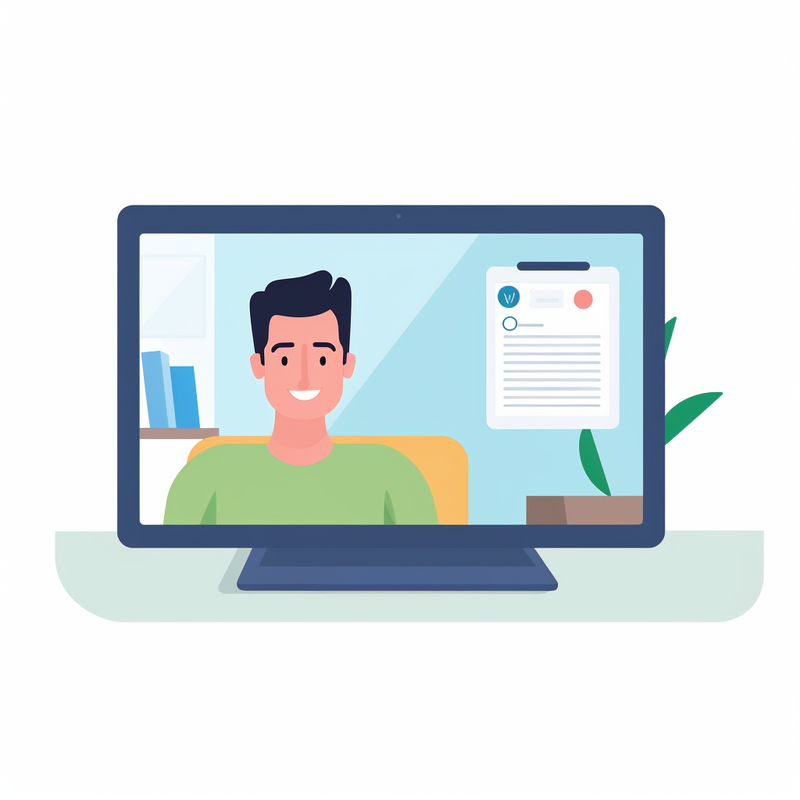
A webcam is a crucial tool in online tutoring and coaching sessions as it plays a significant role in engaging students, providing visual demonstrations, and creating interactive learning experiences. By using a webcam, educators can engage students visually, allowing for a more personal and interactive learning experience. Visual demonstrations are particularly important in subjects such as math or science, where concepts are best understood through visual aids and examples. The webcam also allows for real-time visual feedback and guidance, making learning more dynamic and interactive.
In addition, the webcam enables coaches and tutors to provide interactive learning experiences, such as virtual whiteboard sessions, live demonstrations, and interactive exercises. This allows students to actively participate in the learning process and receive personalized attention, enhancing their overall understanding and retention of the material. Overall, the webcam is a vital tool in online tutoring and coaching, allowing for effective engagement, visual demonstrations, and interactive learning experiences, ultimately leading to more successful and effective educational outcomes.
Webcams have become an essential tool for online learning, providing both tutors and students with numerous benefits. Whether it's for virtual tutoring sessions or online classes, webcams offer convenience, flexibility, and enhanced communication. In this article, we'll explore the advantages of using a webcam for both tutors and students, highlighting how it can improve the learning experience and create more engaging and effective virtual learning environments.
To set up your webcam for optimal use, ensure you have a stable internet connection, the latest version of Google Chrome or Firefox, and functioning headphones with a microphone and webcam.
First, connect your webcam to your computer and position it in a well-lit area, preferably at eye level.
Next, make sure your internet connection is stable to minimize lag and interruptions during video calls or recordings.
Then, open Google Chrome or Firefox and grant permissions for the webcam to be used.
Test your webcam by accessing a video call or using a video recording tool to ensure it is functioning properly.
Lastly, connect your headphones with a working microphone to enable clear audio during video calls or recordings.
With these steps, you'll have successfully set up your webcam for optimal use, ensuring a seamless and high-quality video experience.
When choosing the right webcam for online tutoring, there are several key factors to consider. First, consider the need for easy movement and quick adjustments. A webcam with a flexible base or adjustable stand can make it easier to position the camera for different teaching scenarios. Additionally, consider whether the webcam is built into the device or requires a USB connection. Built-in webcams are convenient, but a USB-connected webcam may offer better image quality and additional features.
It's also important to consider the potential platforms or websites for online tutoring and their specific requirements or preferences for webcams. Some platforms may have specific recommendations for compatible webcams, so it's important to research and ensure that the webcam you choose is compatible with the platform you will be using for tutoring.
In summary, when choosing a webcam for online tutoring, factors to consider include easy movement and quick adjustments, the type of connection (built-in vs USB), and compatibility with the specific platform or website you will be using for tutoring. Taking these factors into account can help ensure that you choose the right webcam to enhance your online tutoring experience.
If you've recently purchased a webcam for your computer, the next step is to install and configure the webcam software so that you can start using it for video calls, recordings, and more. By following the simple steps below, you'll be able to set up your webcam in no time and start enjoying all of its features and functions.
A stable internet connection is vital for effective remote work. Connection instability can significantly impact productivity and communication, leading to missed deadlines and misunderstandings.
A stable internet connection allows for seamless video calls, file sharing, and real-time communication with colleagues. It also ensures that remote workers can access important company resources without interruption. Without a stable connection, remote workers may experience delays, dropped calls, and an overall decrease in efficiency.
To achieve a stable internet connection, remote workers can consider using a wired connection instead of relying solely on Wi-Fi. Upgrading internet service to a higher speed or choosing a more reliable provider can also help improve stability. In addition, optimizing router placement within the home or workspace can minimize interference and signal loss.
Overall, a stable internet connection is crucial for remote work success. By implementing solutions such as using a wired connection, upgrading internet service, and optimizing router placement, remote workers can ensure that they remain productive and effectively communicate with their team members.
A reliable internet connection is crucial for seamless online sessions, especially for online tutoring. Without a stable and strong internet connection, online sessions can suffer from lags, interruptions, and poor audio and video quality. This can significantly impact the effectiveness of the session and cause disruptions that hinder the learning process.
In online class sessions, a poor internet connection can lead to missed instructions, delayed responses, and difficulty in accessing online resources. This can result in frustration for both the tutor and the student, as well as a loss of valuable time and learning opportunities.
To ensure a reliable internet connection during online tutoring sessions, it is important to have a strong Wi-Fi signal or use a wired connection. Additionally, minimizing the use of other devices on the network, closing unnecessary applications, and choosing a quiet and dedicated space for the session can help improve the connection stability.
Regularly checking the internet speed, investing in a good quality router, and contacting the internet service provider for any technical issues can also contribute to a more reliable internet connection.
Ultimately, a reliable internet connection is essential for creating a conducive and uninterrupted online learning environment, allowing for a more effective and productive tutoring experience.
In today's digital world, video conferencing has become an essential means of communication for both personal and professional purposes. However, a poor internet connection can often hinder the experience, leading to lagging, frozen screens, and disrupted audio. To ensure a smooth and seamless video conferencing experience, it is important to optimize your internet connection. By implementing these helpful tips, you can improve the quality of your video calls and have more productive and effective virtual meetings.
When selecting the right video conferencing software, there are several key factors to consider. Firstly, the software should offer live video conferencing with high-quality audio and video capabilities. Direct messaging and screen sharing are also essential features for effective communication and collaboration during virtual meetings. A digital whiteboard can further enhance brainstorming and idea sharing.
Accessibility is another important consideration, as the software should be easy to use for all participants, regardless of their technological proficiency or disabilities. This includes features such as language support, closed captioning, and compatibility with various devices and operating systems.
In addition to these basic features, platform capabilities like recording, real-time document collaboration, and role-based access controls are crucial for productivity and security. Recording capabilities allow for archiving meetings and reviewing discussions, while real-time document collaboration enables participants to work on the same materials simultaneously. Role-based access controls ensure that sensitive information is only accessible to authorized individuals, enhancing data security.
In conclusion, when choosing video conferencing software, it is important to consider not only the basic communication features but also the platform capabilities that can improve productivity, collaboration, and security.
Zoom, Skype, and Google Meet are popular video conferencing platforms that offer a variety of features for users.
Zoom is known for its capabilities in live video conferencing, direct messaging, and screen sharing. It also offers a collaborative whiteboard feature and the ability to record meetings. Zoom is widely accessible across different devices and is known for its ease of use.
Skype also offers live video conferencing and direct messaging, but lacks a collaborative whiteboard feature. It does, however, provide screen sharing and recording options. Skype is easily accessible and user-friendly.
Google Meet offers live video conferencing, direct messaging, and screen sharing. It also allows for collaborative whiteboarding. Google Meet does not have built-in recording options, but users can record meetings using third-party apps. It is accessible and intuitive for users.
In comparison, Zoom offers a comprehensive set of features, including a collaborative whiteboard, while Skype and Google Meet lack this capability. However, Skype and Google Meet have their strengths in terms of accessibility and ease of use, making them suitable options for users who prioritize simplicity.
When selecting a video conferencing software, there are several key features to consider ensuring that the platform meets the needs of your organization. From ease of use and compatibility to security and collaboration tools, finding the right software can greatly impact the success of virtual meetings and communication within your team. By carefully evaluating these key features, you can make an informed decision on which video conferencing software will best serve your organization's needs and ultimately enhance your remote work experience.
The first step in adjusting camera settings is to set the correct white balance. For example, in natural lighting, choose the "daylight" or "cloudy" setting to ensure accurate color representation. In artificial lighting, adjust the white balance to match the type of light, such as "incandescent" or "fluorescent".
Next, adjust the aperture based on the subject being photographed. For portraits or close-up shots, use a wider aperture (lower f-stop number) to create a shallow depth of field and blur the background. For landscapes or group shots, use a smaller aperture (higher f-stop number) to keep everything in focus.
Shutter speed should be adjusted according to the type of lighting and the movement of the subject. In low light, use a slower shutter speed to allow more light into the camera. For fast-moving subjects, use a faster shutter speed to freeze the action.
Lastly, adjust the ISO based on the available light. In bright conditions, use a lower ISO to reduce graininess in the image. In low light, increase the ISO to make the camera more sensitive to light.
By adjusting these camera settings according to the type of lighting and subject, you can ensure the best possible image quality.
Optimizing camera angles and positioning for better visibility is essential for capturing clear and relevant footage. When setting up a camera, it's important to consider factors such as lighting, distance, and potential obstacles.
First, make sure the camera is positioned in an area with good lighting to avoid dark or shadowy footage. Natural lighting is ideal, but if that is not possible, supplemental lighting can be used to improve visibility.
Next, consider the distance between the camera and the subject or area being captured. The camera should be positioned at a distance that allows for clear visibility without being too far away.
Additionally, take into account potential obstacles that may obstruct the view of the camera. Position the camera in a way that minimizes the presence of obstructions such as trees, buildings, or other objects.
Adjusting the camera height, angle, and tilt is also crucial for capturing the most relevant and clear footage. The camera should be positioned at an optimal height to provide a clear view of the subject, and the angle and tilt should be adjusted to focus on the most important areas.
In conclusion, by carefully considering camera angles, positioning, visibility, lighting, and obstacles, it is possible to optimize the camera setup for better visibility and clearer footage.
To adjust the brightness, contrast, and resolution settings on your device, you can access the display or graphics settings. On a computer, you can typically do this through the control panel. Go to the control panel and look for the display settings. Here, you can adjust the brightness, contrast, and resolution to your preference.
On a mobile device, you can access these settings through the display options. Go to the settings menu and look for the display or graphics settings. Here, you will find options to adjust the brightness, contrast, and resolution.
To adjust the brightness, simply move the brightness slider to increase or decrease the brightness level. To adjust the contrast, look for the contrast settings and adjust them accordingly. To change the resolution, find the resolution settings and select the desired resolution from the available options.
By adjusting these settings, you can customize the display to your liking and ensure the best viewing experience for your device.
 Author: Alex Wood