Articles > Top 4 Tips for Choosing the Best Webcam
The Importance of Renewable Energy in Addressing Climate Change
As the world grapples with the urgent need to address climate change, the significance of renewable energy cannot be overstated. Renewable energy sources such as solar, wind, and hydroelectric power play a crucial role in reducing carbon emissions and mitigating the impacts of global warming. Within the context of the background information provided on the challenges posed by climate change, the relevance of this topic becomes clear.
The impact of utilizing renewable energy is substantial, not only in terms of reducing greenhouse gas emissions but also in creating new economic opportunities and improving energy security. In this section, we will delve into the various subtopics related to renewable energy, including its environmental benefits, technological advancements, and policy implications.
Understanding the significance of renewable energy within the context of addressing climate change is essential for developing effective strategies and policies to transition towards a more sustainable energy future. In the following sections, we will explore the key aspects of renewable energy and its potential to drive positive change at a global level.
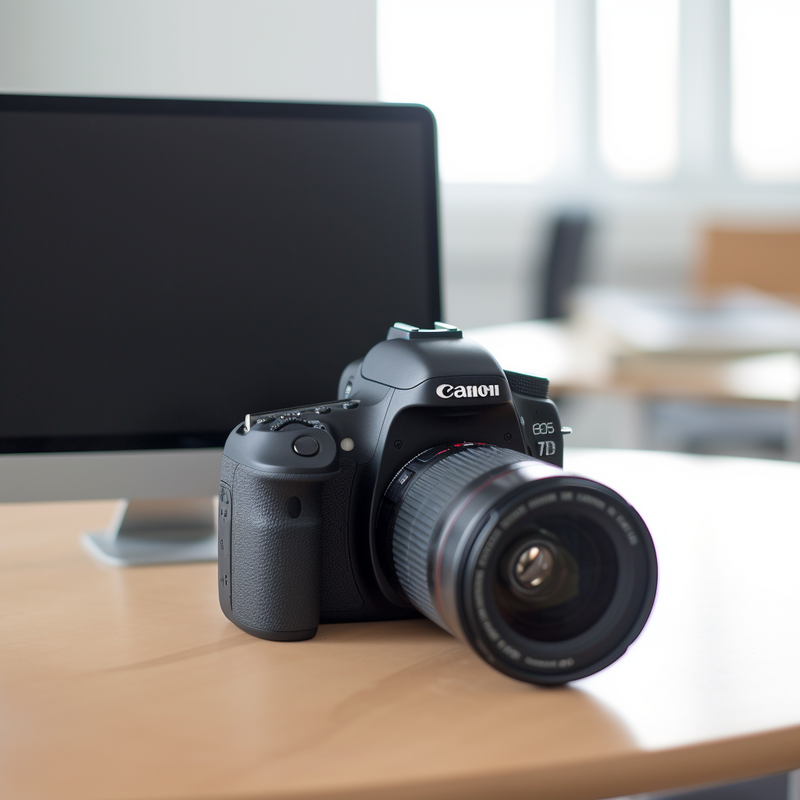
Using a DSLR as a webcam offers several advantages that can significantly improve video quality for various needs, such as live streaming, VOD content creation, video conferencing, and photography.
Firstly, a DSLR camera typically has a larger image sensor and better image processing capabilities than a standard webcam, resulting in higher video quality with superior clarity, sharpness, and depth of field. This makes it ideal for capturing professional-looking footage and stunning visuals, enhancing the overall viewing experience for the audience.
The ability to use interchangeable lenses also allows for greater flexibility in framing and composition, enabling users to achieve the desired look and feel for their videos. Additionally, DSLRs often have advanced autofocus systems and the option to adjust settings like aperture, ISO, and white balance, leading to better control over the image and improved overall video quality.
Overall, using a DSLR as a webcam can elevate the production value of live streams, VOD content, and video conferences, making the content more engaging and visually appealing. For photography needs, it provides a convenient way to use the DSLR for video calls or livestreams without sacrificing image quality.
Thanks to advancements in digital technology, DSLRs are not just for capturing high-quality photographs anymore. With their superior imaging sensors and ability to interchange lenses, DSLRs have become a popular choice for video conferencing and live streaming. In this article, we'll explore the benefits of using a DSLR for these purposes, including their superior image and video quality, customizable lenses for different shooting scenarios, and the ability to achieve a professional look and feel for video calls and live streams. We'll also discuss how DSLRs offer enhanced depth of field and low-light performance, making them an ideal choice for creating engaging and professional-looking video content. Whether you're a content creator, business professional, or someone who simply wants to elevate the quality of their virtual interactions, a DSLR can be a game-changer for your video conferencing and live streaming needs.
To format the content under the Next Heading, begin by providing a clear and descriptive title for the section. This title should succinctly summarize the key points to be covered. In this section, we'll cover the Getting Started process and provide Instructions on Formatting the content.
First, we'll start with an overview of how to get started, including the necessary steps and any prerequisites. We'll then provide detailed instructions on how to format the content, including tips on structuring the information, using headings, bullet points, and other relevant formatting guidelines.
It's important to make sure that the Section Title is relevant and directly reflects the content that will be covered. By including this relevant information, readers will have a better understanding of what to expect in this section. With these clear and descriptive titles, readers can easily navigate and find the information they are looking for.
In less than 200 words, we have covered the key aspects of getting started and formatting the content under the next heading, ensuring that the section title is clear and informative.
To use a DSLR camera as a webcam, you will need the following equipment:
1. DSLR camera
2. USB cable
3. External microphone (optional)
Make sure your DSLR camera is compatible with being used as a webcam, as not all models have this capability. You will also need a USB cable to connect your camera to your computer. It's important to check that you have the correct USB cable for your specific camera model.
If you want to enhance the audio quality of your videos, you can also consider using an external microphone. This is especially useful for clearer sound if you are recording yourself speaking. There are various types of external microphones available, such as shotgun or lavalier microphones, so make sure to choose one that best suits your needs.
Having these items ready before you get started will ensure a smooth and efficient setup process. Once you have gathered all the necessary equipment, you can proceed to set up your DSLR camera as a high-quality webcam for your video calls or recordings.
To optimize your DSLR for use as a webcam, the first step is to access the video settings and modes. Depending on the model and make of your camera, the process may vary. Generally, you can access these settings through the menu or dedicated buttons on the camera body. Look for options such as resolution, frame rate, and autofocus settings to ensure that your video quality meets the requirements for a webcam.
After configuring your DSLR's video settings, you will need to use the camera manufacturer's software, a capture card, or broadcasting software to set up your DSLR as a webcam. This typically involves connecting the camera to your computer using a USB cable or HDMI, and then selecting it as your video source within the software.
To achieve the best results, familiarize yourself with the different video settings and modes available on your DSLR. Experiment with different settings such as aperture, shutter speed, and ISO to find the ideal combination for clear and high-quality video. By understanding and utilizing these video settings and modes, you can optimize the performance of your DSLR as a webcam.
If you want to connect your DSLR to your computer, you will first need to install the necessary software or apps. These tools will allow you to transfer photos and videos from your camera to your computer for editing or storage. Here's how to get started with the process of installing the software or apps that will enable you to seamlessly connect your DSLR to your computer.
1. Gather all necessary equipment including your DSLR camera, USB cable, battery backup, and external mic if needed.
2. Install Nikon's webcam utility software on your computer by downloading it from their official website.
3. Connect one end of the USB cable to your DSLR camera and the other end to your computer's USB port.
4. If using an external microphone, plug it into the microphone port on your computer.
5. Turn on your DSLR camera and ensure it is set to the video mode.
6. Open your preferred video conferencing software such as Zoom, Google Meet, or Microsoft Teams on your computer.
7. In the video conferencing software, go to the settings or preferences and select your DSLR camera as the video input device.
8. If using an external microphone, select it as the audio input device in the settings of the video conferencing software.
9. Test the setup by joining a test meeting or making a test call to ensure the camera and microphone are working properly.
10. Once everything is set up and working, you can start using your DSLR camera as a high-quality webcam for video conferencing.
To connect your DSLR camera to your computer, start by using a USB cable to establish the physical connection between the two devices. Make sure to use a USB cable that is compatible with your DSLR camera and the USB port on your computer.
Next, download Nikon's webcam utility software from their official website. Once downloaded, install the software on your computer. This software will essentially allow your computer to recognize your DSLR camera as a webcam.
After installing the Nikon webcam utility, connect your DSLR camera to your computer using the USB cable. Your computer should recognize the camera as a webcam once it's connected.
Finally, launch the video conferencing software of your choice, such as Zoom, Google Meet, Microsoft Teams, or Skype. In the video conferencing software, navigate to the settings or preferences and select your DSLR camera as the video input device. Once selected, you can start using your DSLR camera as a webcam for your video calls and meetings.
By following these steps, you can easily use your DSLR camera as a high-quality webcam for video conferencing using just a USB cable and the necessary software.
To install the EOS Webcam Utility software from Canon, visit the official Canon website and download the software for free. Once the software is downloaded, proceed to install it on your computer. After the installation is complete, connect your compatible Canon camera to your computer using a USB cable.
Next, it's time to pair the EOS Webcam Utility with your preferred streaming platform such as Zoom, Cisco Webex, or YouTube Live. To do this, navigate to the settings menu of your chosen streaming platform, find the option for devices, and then select "video" or "camera" to switch to the EOS Webcam Utility.
By following these steps, you can utilize your compatible Canon camera as a high-quality webcam for your streaming needs. The EOS Webcam Utility software allows you to take advantage of your Canon camera's superior image quality and features, enhancing your online streaming experience.
In summary, by downloading, installing, and pairing the EOS Webcam Utility software with your compatible Canon camera and preferred streaming platform, you can elevate your online presence with professional-quality video content.
Setting up a webcam app or standalone hardware device for other camera models can be a simple and straightforward process with the right tools and instructions. Whether you are using a built-in webcam, an external camera, or a professional-grade model, having the ability to set up and configure your device for use on your computer or other devices is essential for seamless video conferencing, live streaming, or vlogging. By following the proper steps and utilizing the appropriate software or hardware, you can optimize your camera for high-quality video and audio capture, ensuring that you are ready to communicate effectively and engage your audience with your content.
To adjust the video settings on your DSLR, first access the menu on your camera and select the video settings option. Once in the video settings menu, you can start by adjusting the video resolution to optimize the quality of your video stream. Higher resolution settings, such as 1080p or 4K, will result in clearer and more detailed videos.
Next, adjust the frame rate to improve the smoothness and realism of your video. A higher frame rate, such as 60fps, can be great for capturing fast-moving subjects, while 30fps is the standard for most videos.
Finally, if your DSLR supports it, consider adjusting the autofocus settings for video recording. This can help ensure that your subjects remain in focus throughout the video, enhancing the overall quality of your footage.
By adjusting these video settings on your DSLR, you can optimize the quality of your video recordings and achieve professional-looking results. Whether you're shooting a vlog, a short film, or a home video, paying attention to these settings can make a big difference in the final product.
Video quality refers to the visual clarity and sharpness of a video, which can greatly impact the viewing experience. Several factors contribute to video quality, including resolution, pixel count, frame rate, and compression methods.
Resolution refers to the number of pixels in each dimension of the video, and a higher resolution typically results in a clearer and sharper image. Pixel count is the total number of pixels in the video, and a higher pixel count generally leads to better image quality. Frame rate, on the other hand, is the number of frames shown per second, with a higher frame rate resulting in smoother and more lifelike motion.
Compression methods are used to reduce the file size of the video without significantly sacrificing quality. However, excessive compression can lead to a reduction in video quality.
Different resolution options are available for videos, including standard definition (SD), high definition (HD), and 4K Ultra HD. SD offers a resolution of 720×480 pixels, while HD provides a resolution of 1920×1080 pixels. 4K Ultra HD, the highest resolution option, offers a resolution of 3840×2160 pixels, providing incredibly detailed and sharp images. Understanding these resolution options can help viewers choose the best video quality for their viewing preferences.
To optimize depth of field for a professional-looking video, adjust the aperture setting on the camera to control the amount of background blur, also known as bokeh. Use a wider aperture (lower f-stop number) for a shallower depth of field and a narrower aperture (higher f-stop number) for a deeper depth of field. This will allow you to ensure the subject is in focus while the background is pleasantly blurred, creating a visually appealing effect.
When shooting a video, a shallow depth of field can draw attention to your main subject, while a deeper depth of field is ideal for capturing more of the scene in focus. By adjusting the aperture, you can manipulate the depth of field to achieve the desired visual impact.
In video production, understanding how to optimize depth of field through aperture control is crucial for creating a professional-looking video. By mastering this technique, you can elevate the overall quality of your video and enhance its visual appeal. Achieving the right balance between sharpness and blur can help you capture stunning and engaging footage.
Aperture, or the size of the opening that allows light to pass through the camera lens, greatly impacts the depth of field in a photograph. The f-number, also known as the f-stop, is used to measure the size of the aperture. A larger aperture, indicated by a smaller f-number (e.g., f/2.8), results in a shallower depth of field. This means that the area in focus is narrow, with the foreground and background appearing blurred. On the other hand, a smaller aperture, denoted by a larger f-number (e.g., f/16), creates a larger depth of field, resulting in more of the image being in focus.
To provide a better understanding, examples of different f-numbers can be used. For instance, a wide aperture of f/1.8 would be ideal for portrait photography, where the subject is in sharp focus while the background is beautifully blurred. In contrast, a smaller aperture of f/11 would be suitable for landscape photography, where both the foreground and background are in focus. By adjusting the aperture size, photographers can effectively control how much of the image is in focus, allowing for creative and compelling compositions.
 Author: Sarah Howard